How To Wrap A Cylinder Gift? 3 Methods
While many common gifts will arrive in boxes that are conveniently shaped, not all presents are as straightforward. Gift-givers occasionally find themselves perplexed as they stare at a cylinder-shaped gift, unsure of how to properly, attractively, and simply wrap them. A gift in a cylinder can be wrapped in numerous ways. Learn how to wrap a cylinder gift by reading this article.
Cylinder Gift Wrap Tips
- It is important that you have the right amount of wrapping paper. To pleat the paper completely, there should be enough at both ends. Use moderate amounts of paper, though. The extra paper makes your pleats appear bulky and unkempt, and it makes wrapping more difficult.
- The ideal wrapping paper is light but sturdy. Papers that are thicker and more rigid are more difficult to fold and less forgiving. Avoid using inexpensive, thin papers and foils because they will rip easily, making pleating very frustrating.
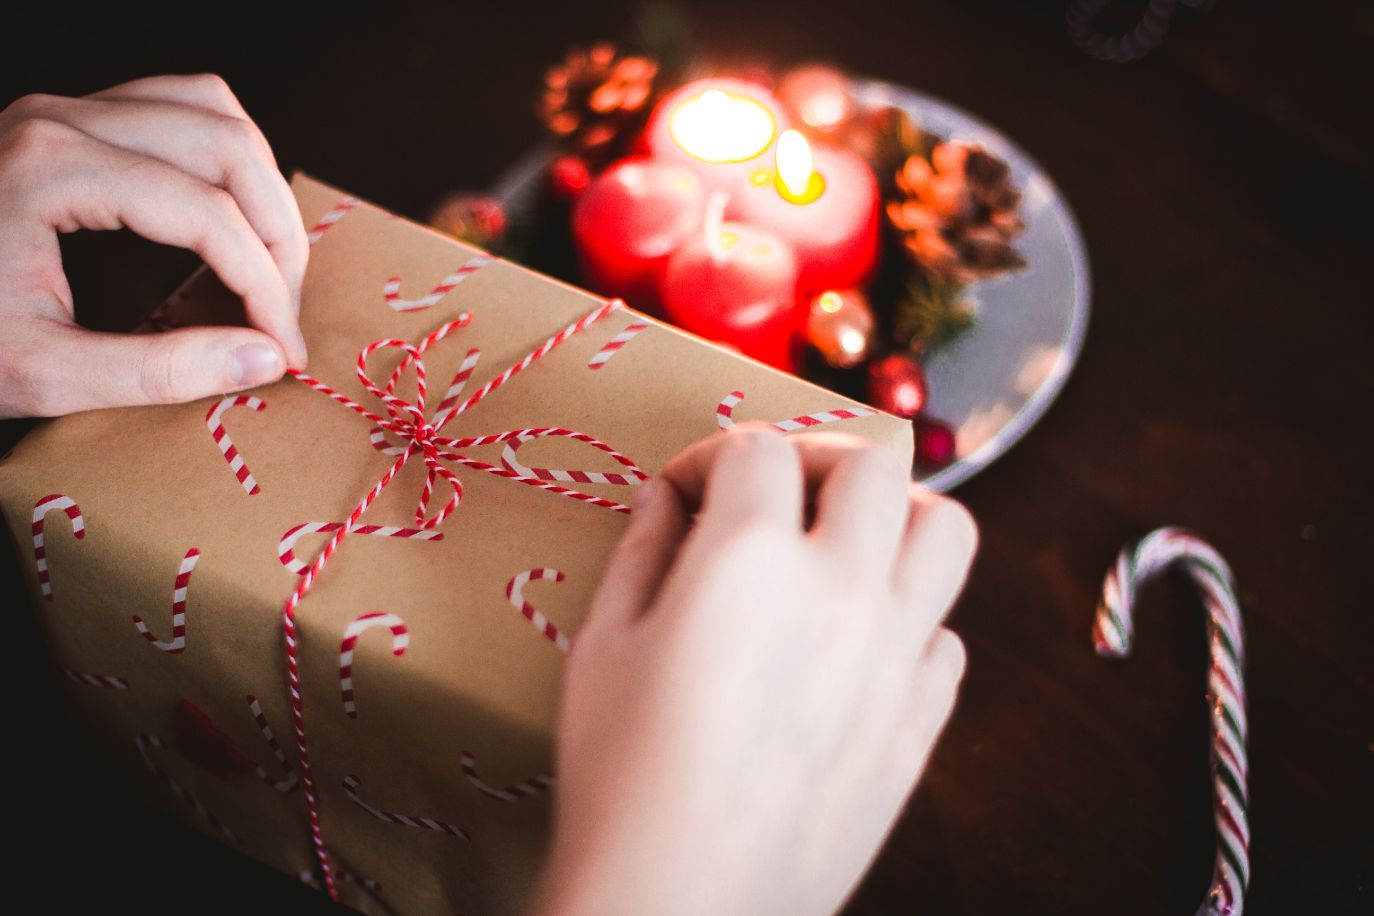
- To make your gift wrap look neat and crisp, go around and pinch all sides with your fingertips for sharp, clean creases.
- If your side pleats don’t look super neat, there’s a quick trick. A large ribbon can be placed on top if it’s just one side. Simply cover it with circle-shaped wrapping paper cutouts if it’s on both sides to conceal any clumsy folds.
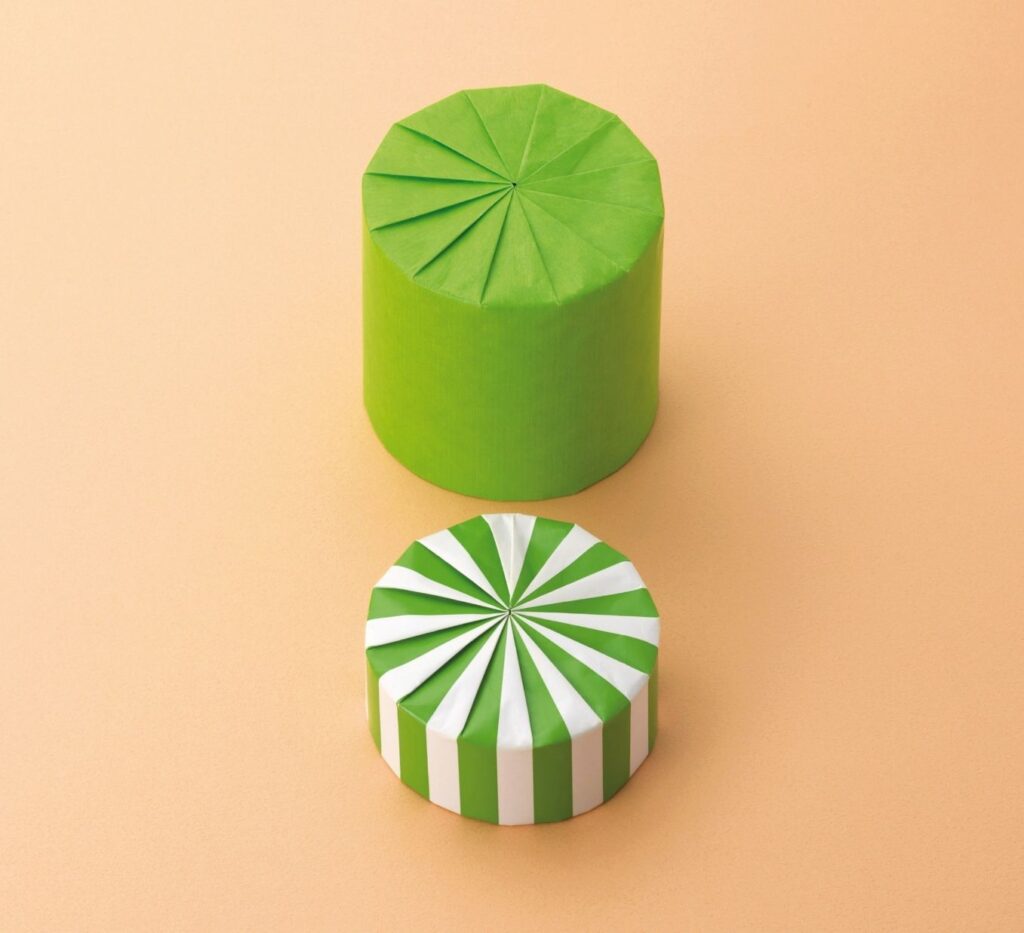
The Fan Fold
Consider using the fan fold if you want to present your cylinder-shaped gifts in a more elegant manner. If you’re learning how to wrap cylinder gifts for the first time, making pleats along each end of the cylinder is a fantastic option.
Measure Carefully
Measuring the gift wrap properly is the most important step in understanding how to wrap a cylinder present. Make sure to work carefully to prevent any potential tearing, and feel free to give yourself a little extra gift wrapping paper to avoid having to start over.
Place the gift on the paper, making sure that the paper wraps around the entire cylinder using the gift as a point of reference.
When cutting the paper, leave at least a half-inch of extra paper. Make sure that when you cut the paper for the gift’s ends, it can be easily reached from both sides at the center.
Wrap The Paper Around The Cylinder Lengthwise
Make sure the gift is in the exact center of the gift wrapping paper after cutting it. Ensure that the paper is taped shut around the gift before wrapping it around the cylinder. If the gift shifts while doing this, feel free to slide it even further into the center.
Create Pleats On Each End
Take the paper’s seam and fold it into the center of the gift, beginning at one of its ends. With one hand, take the edge of the paper and pull it to the center while holding down this piece with the other.
This is how the concept of wrapping is named; the paper should fold into a fan with pleats. Each pleat should be creased with a finder as you proceed around the central cylinder. Once this step is finished, repeat it for the other end of the gift.
Hide Blemishes And Decorate As Desired
Examine the gift after it has been wrapped, and, if necessary, add paper to cover any minor mistakes that occurred. If the fan fold’s pleats are a little haphazard, it is simple to cover them up by inserting a small circle in the center of the end. If there are still problems, feel free to fix them before adding a bow, ribbon, or other finishing touches.
Candy-twist Fold
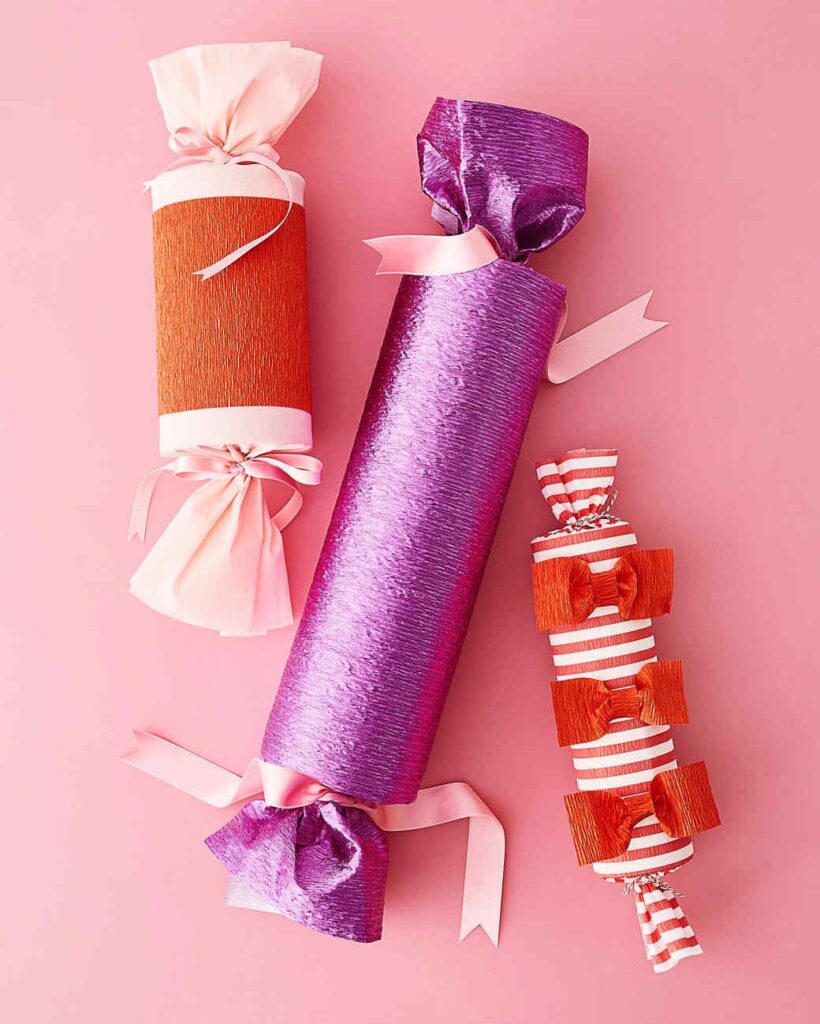
Pleat The Paper To Create A Professional Look
Pleat the paper to give cylinder gifts a polished appearance. Next, fold the paper so that its four corners are in the center. To create the pleats, use a finder. Your gift will look better wrapped if you follow these instructions precisely.
Use clear tape to fix the wrinkles once they are complete. This will assist you in giving your gift a tidy appearance.
Tie The Ribbon On Both Ends Of The Wrapping Paper
If you are planning to wrap a cylinder gift for a child, you must follow the guidelines that accompany cylindrical gifts:
- The cylinder’s length and diameter need to be measured. The wrapping paper can be measured and cut once you are aware of these numbers.
- Both ends of the paper should be wrapped with a ribbon.
- Finish the cylinder gift’s wrapping by tying ribbons to both ends of the paper.
Fold the good side of the wrapping paper downward after it has been cut to size. Then, if you folded it 1/4 inch, that would be helpful. After that, sandwich the cylinder between the two sheets of paper.
Additionally, you can crimp the ends to form a candy shape. The wrapping paper can then be tied with a ribbon at both ends, and a gift tag or card can be affixed.
Twist The End Of The Wrapping Paper To Create A Professional Look
Make sure to use enough wrapping paper to completely cover the cylinder when you are enclosing gifts in cylinders. When you have enough paper, start wrapping the cylinder. On either side of the cylinder, leave a half-inch gap.
Twist the ends together after you’ve finished wrapping the cylinder to give them a polished appearance. The wrapped cylinder can also be embellished with a gift tag or gift card.
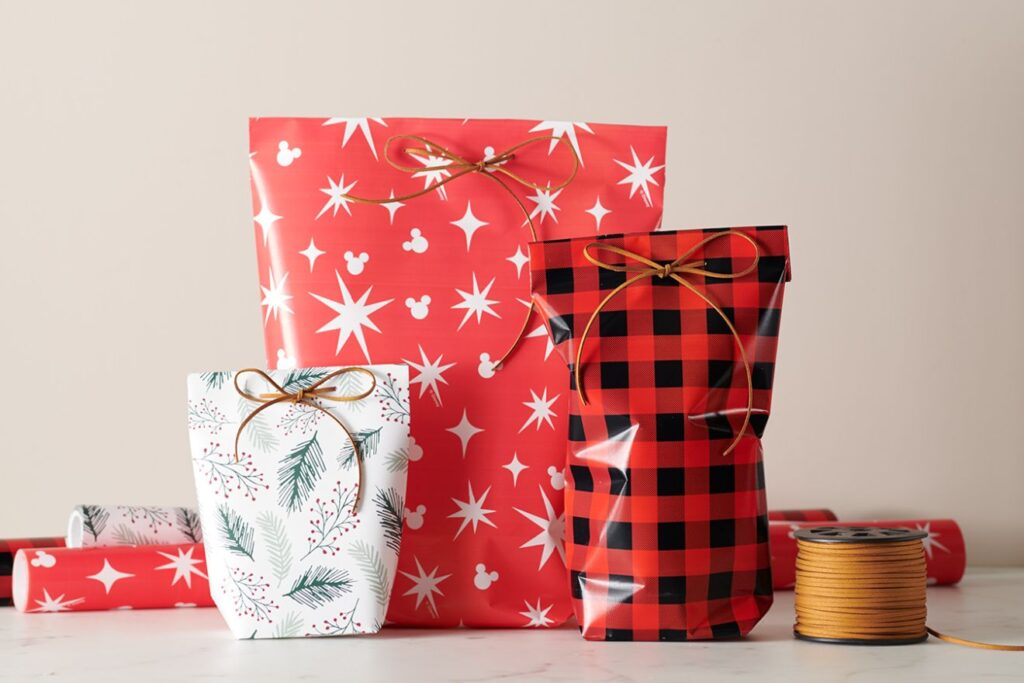
A Classic Gift Bag
Sometimes there is simply not enough time to gather the materials and meticulously learn how to wrap a cylinder gift. Gift bags can save the day at that point.
The fact that you’re selecting a gift bag does not preclude the gift from appearing professionally wrapped. If you enjoy the practicality of gift bags, here are some ideas for you.
Wrap Cylinder Gift In Tissue Paper
Place the gift on the tissue paper making sure that the paper wraps around the entire cylinder using the gift as a point of reference. When cutting the paper, leave at least 0.5 inches of extra paper to be used later.
Make sure there is enough paper to cover the gift when cutting it for each end. The measurements don’t have to be exact because this is just tissue paper, but they should completely enclose the cylinder.
Choose The Correct Gift Bag
Gift bags might be a quick and easy substitute for wrapping a cylindrical gift, but they are not without risk. It’s crucial to pick a gift bag that will completely conceal the gift and is appropriate for the weight of the item.
Make sure the entire gift can fit in the bag without having too much extra because you shouldn’t let your recipient get a sneak peek.
Place Gift In Bag
Whether it’s upright or on its side, place the gift in the bag’s center in the proper location. If possible, store items upright to prevent spills, such as wine bottles and cookie jars.
Add Decorative Tissue Paper
Once the gift is inside, add more tissue paper to help you hide it. Make sure to flare the ends sticking out of the bag to give the gift a floral appearance. Once you’ve completed that, feel free to tie a bow on top and a ribbon around the handles, and you’re ready to go!
Read More: