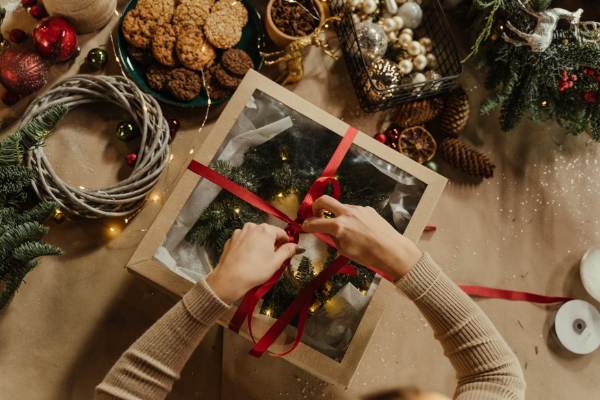
How To Wrap Odd-shaped Gifts: 9 Ways
Square boxes are easy to wrap, but if this holiday season you find yourself exchanging oddly shaped gifts like bottles, balls, stuffed animals, and more, you might be perplexed as to how exactly to hide them. We offer 9 pieces of advice on how to deliver a flawless package and steer clear of a shoddy wrapping job, so don’t be alarmed, gift giver.
Create A No-box Bundle
Have something that lacks neat, clean edges? A bundle can be easily made, and it also has a very stylish appearance, so no worries there!
Your Supplies
- wrapping paper
- tape
- 2 ribbons
- scissors
- hole punch
How To Do It
- On all sides, cut the paper so that it is a few inches larger than your item.
- Form a tube out of the paper and wrap it around the gift. Tape that edge!
- To cover the paper’s edge, pinch one end of the tube flat, fold it over, and then fold it again. (Fasten with a tiny piece of tape if it starts to unfold on you.)
- Step 3 should be repeated at the opposite end.
- You’ll need to punch at least two holes per side, but if the item is larger, you may need more.
- Through the holes, thread a ribbon. Put a beautiful bow on it!
Pro tip: Use your imagination when it comes to how many holes you make and how you thread and tie the ribbon!
Diy A Festive Gift Pouch
Flatter, smaller items work best with this variant of the bundling technique.
Your Supplies
- wrapping paper
- tape
- 6- to 10-inch strip of ribbon or twine
- hole punch
- scissors
- evergreen, rosemary, or holly sprigs (optional)
How To Do It
- Cut your wrapping paper so that it is roughly twice as wide and a few inches taller than your item.
- Fold the paper so that the blank side is facing up and the two sides overlap in the middle by about an inch.
- With tape, affix the overlap.
- To hide the edge, fold the bottom up by about an inch, then tape.
- Use the hole-punch to create a centered hole for the ribbon or twine at the pouch’s open end.
- Place your gift inside the pouch.
- Through the top hole, thread the ribbon or twine, then tie a bow or handle.
- Add a small cheery sprig to the knot if you’re feeling particularly fancy.
Pro tip: To prevent the ribbon or twine from ripping through, wrap gifts in sturdy paper.
Break Out The Streamers
Make a statement with party streamers! Your recipient will be able to make a guess as to what is inside the vibrant wrapping as your gift’s shape peeks through.
Your Supplies
- a roll of crepe paper streamers (have fun with the color or pattern!)
- clear tape
- decorative bow (optional)
How To Do It
- Tape the end of a streamer on your gift to begin, if it won’t get damaged.
- Make sure the crepe paper overlaps to completely cover the object as you continue to wrap the streamer around it.
- Secure the end with tape after the item has been entirely concealed.
- Optional: Add some style by covering the tape with a bow!
Pro tip: When giving plush or soft gifts, avoid using this technique. And be careful of how the item may appear wrapped; some things are better *not* left to the consumer’s imagination.
Reuse An Old Box
Have a lot of empty boxes from your online purchases? Use one to simplify gift wrapping and give the box a second chance at life (three cheers for recycling).
Your Supplies
- a box big enough for the item
- wrapping paper
- tape
- newspaper or bubble wrap (optional)
How To Do It
- Stack the box with the present.
- If necessary, add newspaper or bubble wrap to cushion the gift.
- The box should be taped shut.
- Wrap it up.
Pro tip: Using a box from a gift that costs champagne for one that costs beer? To prevent trickery, you *might* want to cover the logo or image. Use stickers, sweet notes, or puns to decorate the box for some fun.
Make A Fort
No time to wrap an enormous gift with an unusual shape? It doesn’t get any easier than covering it with a tablecloth or blanket!
Your Supplies
- a blanket, tablecloth, sheet, or beach towel
How To Do It
- Drape the gift.
- When the recipient is prepared, ask them to take off the covering. (Flourish optional!)
Pro tip: Use a holiday blanket, grandma’s quilt, or a beach towel you shared with the gift recipient to add sentimental value.
Put A Bow On It
Anything that is too big or awkwardly shaped to be wrapped traditionally is ideal for a bow.
Your Supplies
- a bow (size, shape, and color are up to you!)
- tape (if needed)
How To Do It
- Attach the bow to the object.
- If the bow is unsteady, tape it down. Just be cautious not to apply tape in any areas where it might scuff the gift.
Pro tip: Bows can be found in all shapes and sizes at retail establishments, but you can also make your own. If you’re interested in giving it a try, there are tons of tutorials on the internet!
Light It Up
Beyond your Christmas tree or dorm room, string lights can add some flair. Make an oddly shaped gift merry and bright by using lights to brighten your recipient’s day!
Your Supplies
- set of string lights
How to do it
- Lights should be used to completely encircle the gift.
- Plug ’em in.
- Voila!
Pro tip: There are many different colors and bulb sizes available for string lights. Have fun picking a category based on the gift or the recipient!
Give Something Wrapped In Fabric
Any object, regardless of shape, can be wrapped in a vintage scarf or pretty fabric scrap, and since it can be reused, it’s a green gift idea. All you need is some lovely ribbon in addition to the fabric. Here’s how to go about it.
- The gift should be placed in the center of the flattened scarf.
- The scarf should be folded in half from the bottom up.
- Fold the scarf’s top down to the middle.
- A pretty ribbon should be used to secure each side as you pull them over the center of the package.
Make A Gift Bag Out Of Paper
You never seem to be able to find the perfect size at the right time, unless you stash away mountains of gift bags. It’s actually very simple and practical to make this DIY gift bag, despite its appearance of complexity. A roll of wrapping paper, some tape, and a pair of scissors are all you need. How to create it is given below.
- Lay your gift in the center of the paper after unfolding it face down. Cut the paper after allowing space on each side to wrap the gift.
- Tape the paper together in the middle after slightly overlapping each side of the paper as you fold it toward the center.
- Folding the paper’s lower half up and toward the center will create the bag’s bottom. Keep your gift nearby to make sure you leave enough room at the bottom of the bag. Place your fingers in the center (near the seam) of the folded portion, and then slowly pull the top portion back. This will open the folded portion. Now the bottom fold ought to resemble a diamond.
- To crease the folds, lightly press the diamond-shaped flat.
- To bring the top and bottom points of the diamond together, fold the top point back down toward the center and the bottom point upward toward the center.
- Tape the points.
- Cut a piece of cardboard to fit in the bottom of the bag to give it a little more stability. You might be able to skip this process if the gift is lightweight, like a stuffed animal.
- Put the present at the bag’s base.
- Add a pretty ribbon and fold over the top half before taping it to the back of the package.